nearPlane ADSB Tracker for M5StickC Plus 2
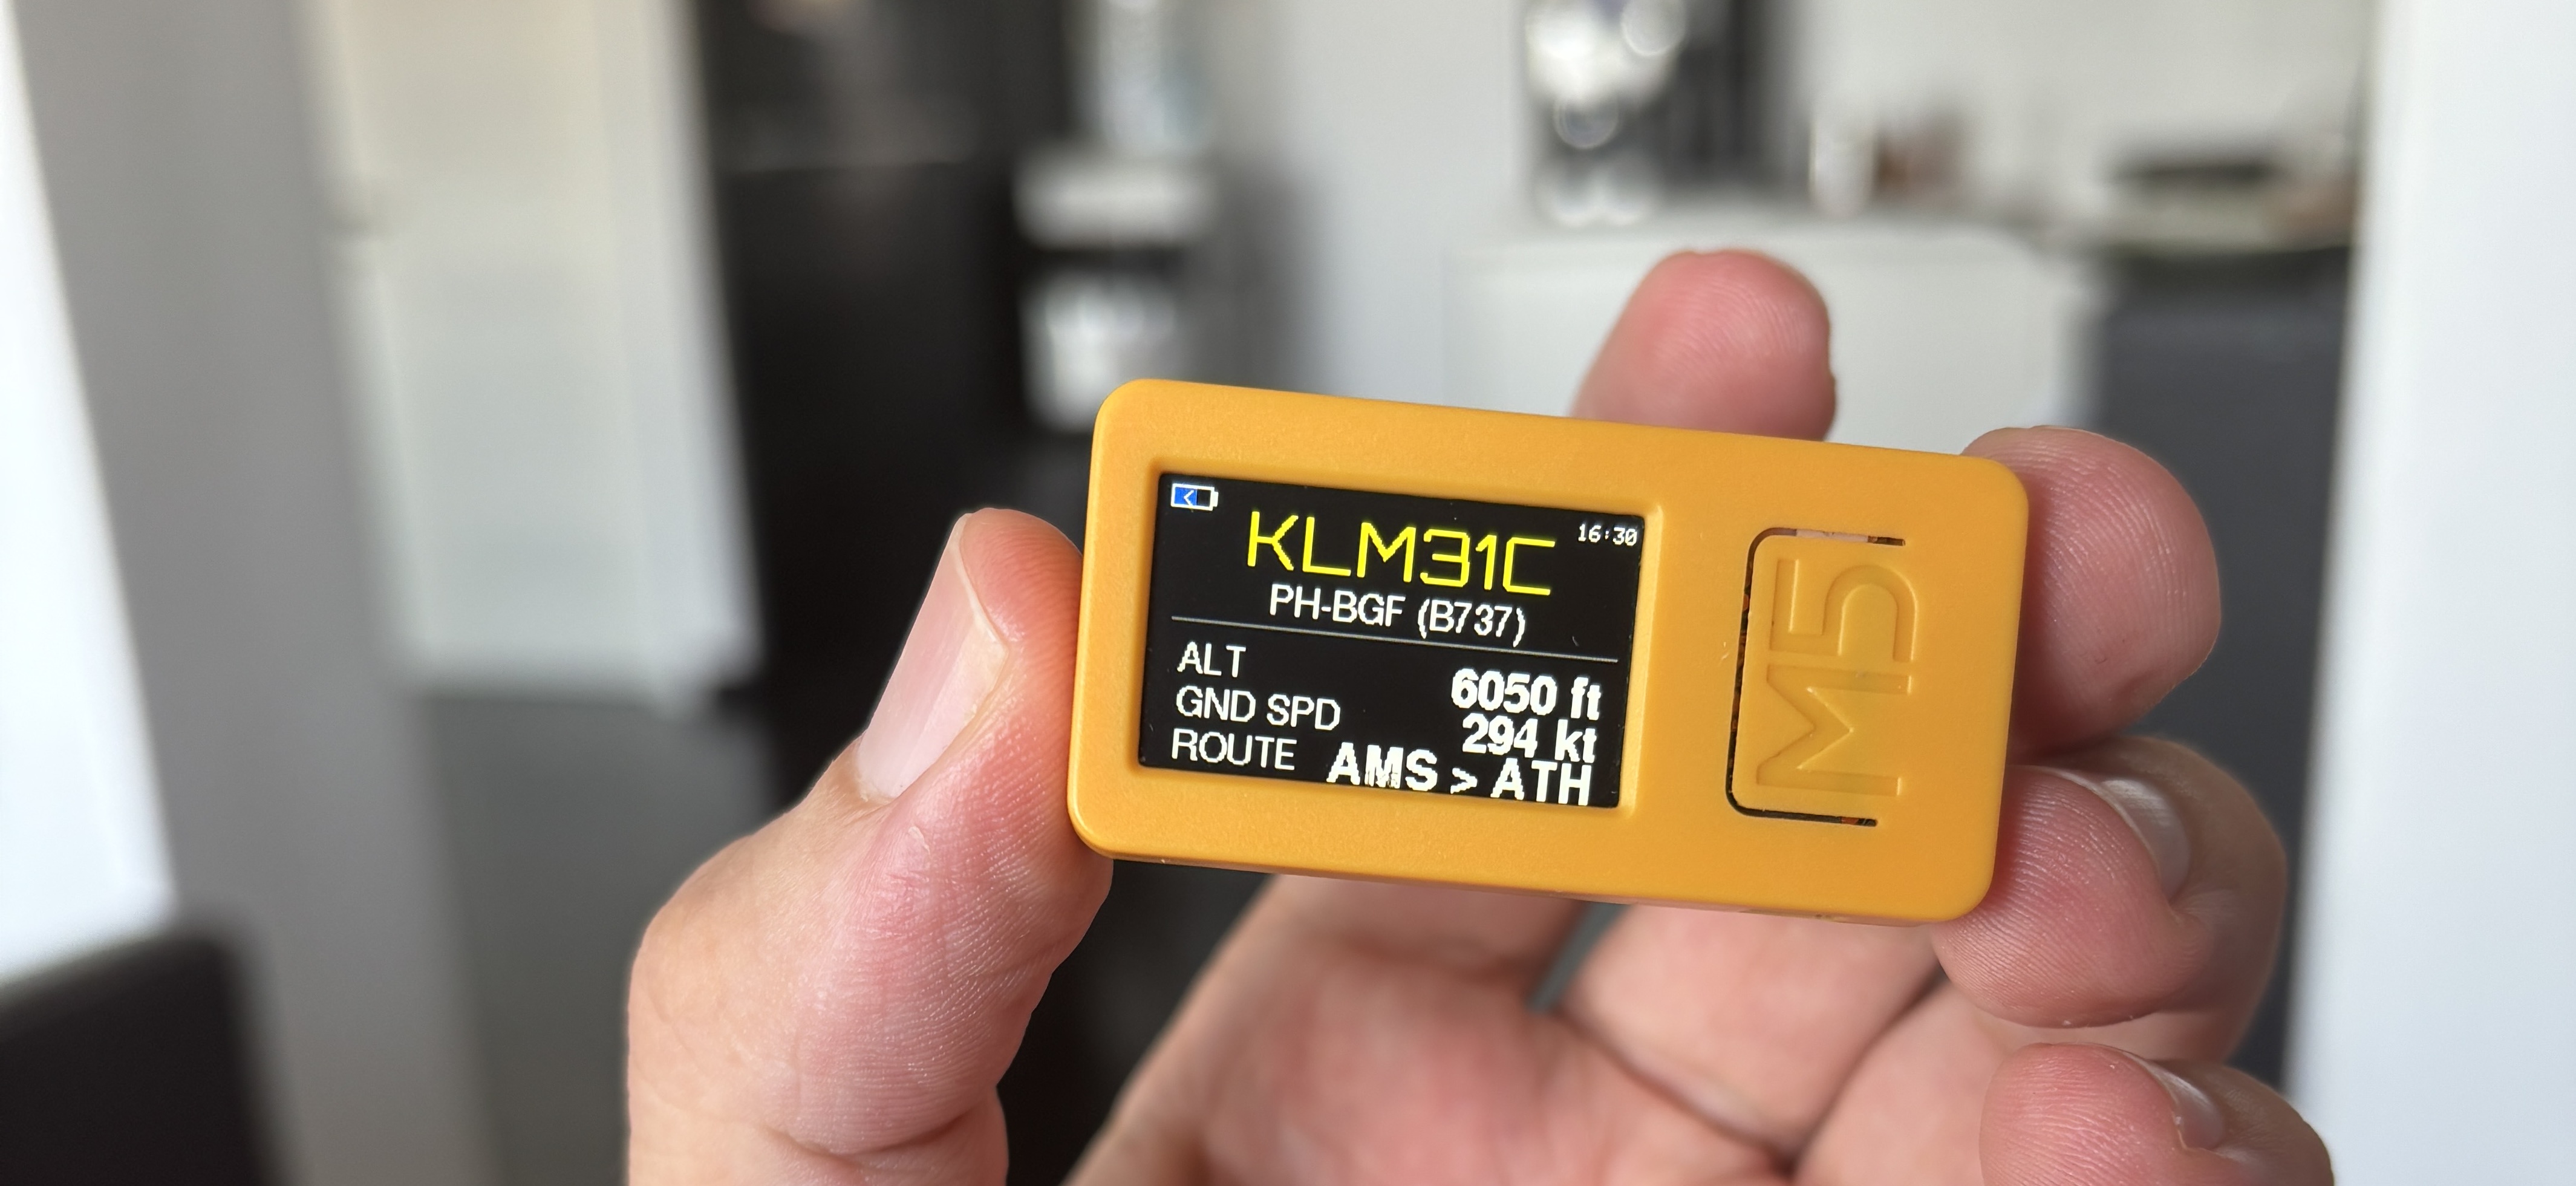
So, I was inspired by this reddit post, and he was inspired by this one. But hey, in the end, I created this nearPlane.
It transforms your M5StickC Plus 2 thing which dying in your stuff drawer (I know you have one, everybody does, no worries) into a portable, real-time aircraft tracker. No need to check Flightradar or something else. IDK if you’re that much of an avgeek, but it’s perfect for aviation enthusiasts, curious minds, and anyone who’s ever looked up at the sky and wondered, “What plane is that?”
The tracker fetches data from adsb.lol, a free, open-source community-driven project that collects and provides real-time ADS-B (Automatic Dependent Surveillance-Broadcast) data from aircraft around the world. This allows you to see detailed flight information without needing your own expensive radio hardware.
Features
- Real-Time Tracking: Displays the closest aircraft’s flight data, updated every few seconds.
- Reliable Flight Route Information: Displays the departure and arrival airports (IATA codes) for most commercial flights by querying the adsb.lol API directly.
- Multi-Page Interface: Cycle through 6 different pages of detailed telemetry, including altitude, speed, heading, squawk code, and more.
- Emergency Alerts: The display highlights aircraft with emergency squawk codes (7500, 7600, 7700).
- Audible Alerts: Plays a distinct tone when a new aircraft is detected.
- Easy Web-Based Configuration: An initial setup mode allows you to easily connect the device to your Wi-Fi and set your location.
- Factory Reset: An easy hardware-button-based reset to clear settings.
Install
It’s listing on m5burner now! 🎉 Search as “nearPlane” and burn directly your device or 👇🏻
Do you want one?
Prerequisites
- Buy a M5StickC Plus 2 (ask your wife before order one)
- Ensure Arduino IDE installed
- A USB-C cable for programming and charging
Installation Guide
Follow these steps to compile and upload the tracker firmware to your M5StickC Plus 2.
1. Install USB Driver
The M5StickC Plus 2 uses a CH9102 chip for USB communication. You will need to install the driver for your operating system to ensure your computer can communicate with the device.
- Open the Arduino IDE.
- Go to File > Preferences (or Arduino IDE > Settings… on MacOS).
- In the “Additional boards manager URLs” field, paste the following URL:
https://m5stack.oss-cn-shenzhen.aliyuncs.com/resource/arduino/package_m5stack_index.json
- Click OK.
3. Install M5StickC Plus 2 Board Support
- Go to Tools > Board > Boards Manager….
- Search for
M5Stack.
- Install the “M5Stack Boards” package by M5Stack.
4. Install Required Libraries
This project requires two main libraries.
- Go to Tools > Manage Libraries… (or Sketch > Include Library > Manage Libraries…).
- Search for and install the following libraries:
M5Unified (Install the latest version).ArduinoJson by Benoit Blanchon (Install the latest version).
5. Load and Burn the Firmware
- Clone this repository or download the source code.
- Open the main
.ino file in the Arduino IDE.
- Connect your M5StickC Plus 2 to your computer with the USB-C cable.
- Go to Tools > Board and from the “M5Stack Arduino” section, select “M5StickCPlus2”.
- Go to Tools > Port and select the serial port corresponding to your device (e.g.,
COM3 on Windows, /dev/cu.wchusbserial... on MacOS).
- Click the Upload button (the arrow icon) to compile and flash the firmware to the device.
Device Configuration
After successfully burning the firmware, the device will boot into “SETUP MODE” for the first time.
- On your smartphone or computer, search for Wi-Fi networks and connect to the one named
nearPlane-ADSB-Tracker-Setup.
- Once connected, open a web browser and navigate to
http://192.168.4.1.
- You will see a configuration page. Enter the following details:
- WiFi Network (SSID): The name of your local Wi-Fi network.
- WiFi Password: The password for your Wi-Fi.
- Your Latitude: Your current latitude (e.g.,
41.015137).
- Your Longitude: Your current longitude (e.g.,
28.979530).
- Scan Radius (km): The radius around your location to scan for aircraft (e.g.,
50).
- Click “Save & Reboot”.
The M5StickC Plus 2 will save your settings and restart. It will then automatically connect to your specified Wi-Fi network and begin tracking aircraft.
Usage
- Change Page: Short press the large button on the front (BtnA) to cycle through the different information pages.
- Reset Settings: To clear all saved settings and re-enter “SETUP MODE”, press and hold the right-side button (BtnB) for 5 seconds. A confirmation screen will appear during the hold.
Changelog
v1.1 - Sep 10,2025
- Flight Route Fetching:
- Implemented the correct and most reliable method by sending a
POST request to the https://api.adsb.lol/api/0/routeset endpoint with the current aircraft’s callsign.
- This provides significantly more accurate departure and arrival airport data directly from the adsb.lol ecosystem, eliminating the need for external API keys and solving previous issues with empty or incorrect route information.
v1.0 - Sep 9,2025
- Initial Release:
- Bare/minimum working copy
Contributing
Contributions are welcome! If you’d like to help improve the project, please follow these steps:
- Fork the repository on GitHub.
- Create a new branch for your feature or bug fix.
- Make your changes and commit them with clear, descriptive messages.
- Push your branch to your forked repository.
- Create a Pull Request (PR) back to the main repository, explaining the changes you have made.
License
This project is open-source. Please feel free to use, modify, and distribute the code.


评论