
Create high-quality meshes with ease.





pygalmesh is a Python frontend to CGAL’s
2D and 3D mesh generation
capabilities. pygalmesh makes it easy
to create high-quality 2D, 3D volume meshes, periodic volume meshes, and surface meshes.
Examples
2D meshes

CGAL generates 2D meshes from linear constraints.
import numpy as np
import pygalmesh

points = np.array([[0.0, 0.0], [1.0, 0.0], [1.0, 1.0], [0.0, 1.0]])
constraints = [[0, 1], [1, 2], [2, 3], [3, 0]]

mesh = pygalmesh.generate_2d(
    points,
    constraints,
    max_edge_size=1.0e-1,
    num_lloyd_steps=10,
)
# mesh.points, mesh.cells
The quality of the mesh isn’t very good, but can be improved with
optimesh.
A simple ball
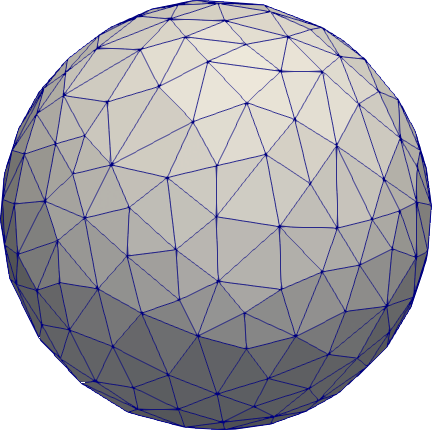
import pygalmesh

s = pygalmesh.Ball([0, 0, 0], 1.0)
mesh = pygalmesh.generate_mesh(s, max_cell_circumradius=0.2)

# mesh.points, mesh.cells, ...
You can write the mesh with
mesh.write("out.vtk")
You can use any format supported by meshio.
The mesh generation comes with many more options, described
here. Try, for example,
mesh = pygalmesh.generate_mesh(
    s, max_cell_circumradius=0.2, odt=True, lloyd=True, verbose=False
)
Other primitive shapes

pygalmesh provides out-of-the-box support for balls, cuboids, ellipsoids, tori, cones,
cylinders, and tetrahedra. Try for example
import pygalmesh

s0 = pygalmesh.Tetrahedron(
    [0.0, 0.0, 0.0], [1.0, 0.0, 0.0], [0.0, 1.0, 0.0], [0.0, 0.0, 1.0]
)
mesh = pygalmesh.generate_mesh(
    s0,
    max_cell_circumradius=0.1,
    max_edge_size_at_feature_edges=0.1,
)
Domain combinations

Supported are unions, intersections, and differences of all domains. As mentioned above,
however, the sharp intersections between two domains are not automatically handled. Try
for example
import pygalmesh

radius = 1.0
displacement = 0.5
s0 = pygalmesh.Ball([displacement, 0, 0], radius)
s1 = pygalmesh.Ball([-displacement, 0, 0], radius)
u = pygalmesh.Difference(s0, s1)
To sharpen the intersection circle, add it as a feature edge polygon line, e.g.,
import numpy as np
import pygalmesh

radius = 1.0
displacement = 0.5
s0 = pygalmesh.Ball([displacement, 0, 0], radius)
s1 = pygalmesh.Ball([-displacement, 0, 0], radius)
u = pygalmesh.Difference(s0, s1)

# add circle
a = np.sqrt(radius**2 - displacement**2)
max_edge_size_at_feature_edges = 0.15
n = int(2 * np.pi * a / max_edge_size_at_feature_edges)
alpha = np.linspace(0.0, 2 * np.pi, n + 1)
alpha[-1] = alpha[0]
circ = a * np.column_stack([np.zeros(n + 1), np.cos(alpha), np.sin(alpha)])

mesh = pygalmesh.generate_mesh(
    u,
    extra_feature_edges=[circ],
    max_cell_circumradius=0.15,
    max_edge_size_at_feature_edges=max_edge_size_at_feature_edges,
    min_facet_angle=25,
    max_radius_surface_delaunay_ball=0.15,
    max_circumradius_edge_ratio=2.0,
)
Note that the length of the polygon legs are kept in sync with
max_edge_size_at_feature_edges of the mesh generation. This makes sure that it fits in
nicely with the rest of the mesh.
Domain deformations
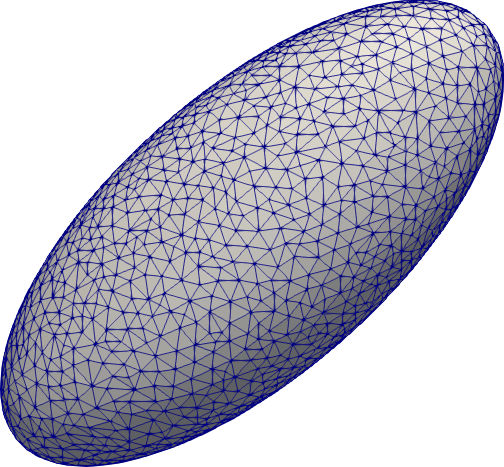
You can of course translate, rotate, scale, and stretch any domain. Try, for example,
import pygalmesh

s = pygalmesh.Stretch(pygalmesh.Ball([0, 0, 0], 1.0), [1.0, 2.0, 0.0])

mesh = pygalmesh.generate_mesh(s, max_cell_circumradius=0.1)
Extrusion of 2D polygons

pygalmesh lets you extrude any polygon into a 3D body. It even supports rotation
alongside!
import pygalmesh

p = pygalmesh.Polygon2D([[-0.5, -0.3], [0.5, -0.3], [0.0, 0.5]])
max_edge_size_at_feature_edges = 0.1
domain = pygalmesh.Extrude(
    p,
    [0.0, 0.0, 1.0],
    0.5 * 3.14159265359,
    max_edge_size_at_feature_edges,
)
mesh = pygalmesh.generate_mesh(
    domain,
    max_cell_circumradius=0.1,
    max_edge_size_at_feature_edges=max_edge_size_at_feature_edges,
    verbose=False,
)
Feature edges are automatically preserved here, which is why an edge length needs to be
given to pygalmesh.Extrude.
Rotation bodies

Polygons in the x-z-plane can also be rotated around the z-axis to yield a rotation
body.
import pygalmesh

p = pygalmesh.Polygon2D([[0.5, -0.3], [1.5, -0.3], [1.0, 0.5]])
max_edge_size_at_feature_edges = 0.1
domain = pygalmesh.RingExtrude(p, max_edge_size_at_feature_edges)
mesh = pygalmesh.generate_mesh(
    domain,
    max_cell_circumradius=0.1,
    max_edge_size_at_feature_edges=max_edge_size_at_feature_edges,
    verbose=False,
)
Your own custom level set function

If all of the variety is not enough for you, you can define your own custom level set
function. You simply need to subclass pygalmesh.DomainBase and specify a function,
e.g.,
import pygalmesh


class Heart(pygalmesh.DomainBase):
    def __init__(self):
        super().__init__()

    def eval(self, x):
        return (
            (x[0] ** 2 + 9.0 / 4.0 * x[1] ** 2 + x[2] ** 2 - 1) ** 3
            - x[0] ** 2 * x[2] ** 3
            - 9.0 / 80.0 * x[1] ** 2 * x[2] ** 3
        )

    def get_bounding_sphere_squared_radius(self):
        return 10.0


d = Heart()
mesh = pygalmesh.generate_mesh(d, max_cell_circumradius=0.1)
Note that you need to specify the square of a bounding sphere radius, used as an input
to CGAL’s mesh generator.
Local refinement
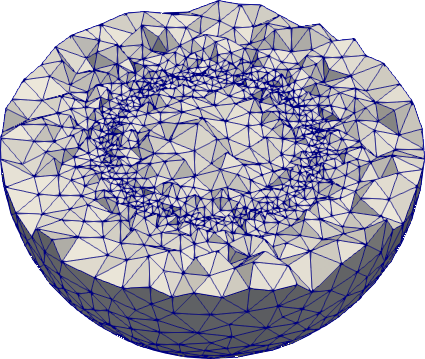
Use generate_mesh with a function (regular or lambda) as max_cell_circumradius. The
same goes for max_edge_size_at_feature_edges, max_radius_surface_delaunay_ball, and
max_facet_distance.
import numpy as np
import pygalmesh

mesh = pygalmesh.generate_mesh(
    pygalmesh.Ball([0.0, 0.0, 0.0], 1.0),
    min_facet_angle=30.0,
    max_radius_surface_delaunay_ball=0.1,
    max_facet_distance=0.025,
    max_circumradius_edge_ratio=2.0,
    max_cell_circumradius=lambda x: abs(np.sqrt(np.dot(x, x)) - 0.5) / 5 + 0.025,
)
Surface meshes
If you’re only after the surface of a body, pygalmesh has generate_surface_mesh for
you. It offers fewer options (obviously, max_cell_circumradius is gone), but otherwise
works the same way:
import pygalmesh

s = pygalmesh.Ball([0, 0, 0], 1.0)
mesh = pygalmesh.generate_surface_mesh(
    s,
    min_facet_angle=30.0,
    max_radius_surface_delaunay_ball=0.1,
    max_facet_distance=0.1,
)
Refer to CGAL’s
documentation for the
options.
Periodic volume meshes
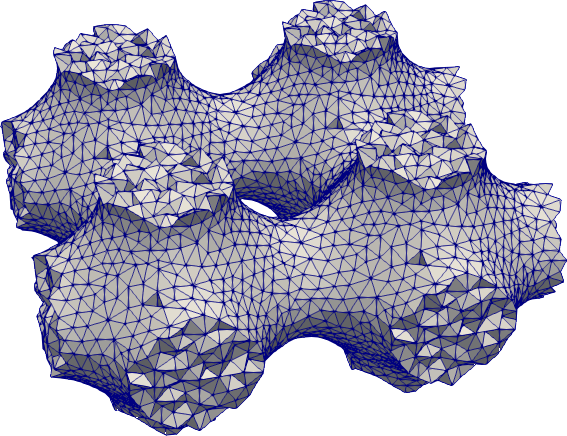
pygalmesh also interfaces CGAL’s 3D periodic
mesh generation. Besides a
domain, one needs to specify a bounding box, and optionally the number of copies in the
output (1, 2, 4, or 8). Example:
import numpy as np
import pygalmesh


class Schwarz(pygalmesh.DomainBase):
    def __init__(self):
        super().__init__()

    def eval(self, x):
        x2 = np.cos(x[0] * 2 * np.pi)
        y2 = np.cos(x[1] * 2 * np.pi)
        z2 = np.cos(x[2] * 2 * np.pi)
        return x2 + y2 + z2


mesh = pygalmesh.generate_periodic_mesh(
    Schwarz(),
    [0, 0, 0, 1, 1, 1],
    max_cell_circumradius=0.05,
    min_facet_angle=30,
    max_radius_surface_delaunay_ball=0.05,
    max_facet_distance=0.025,
    max_circumradius_edge_ratio=2.0,
    number_of_copies_in_output=4,
    # odt=True,
    # lloyd=True,
    verbose=False,
)
Volume meshes from surface meshes

If you have a surface mesh at hand (like
elephant.vtu), pygalmesh generates a
volume mesh on the command line via
pygalmesh volume-from-surface elephant.vtu out.vtk --cell-size 1.0 --odt
(See pygalmesh volume-from-surface -h for all options.)
In Python, do
import pygalmesh

mesh = pygalmesh.generate_volume_mesh_from_surface_mesh(
    "elephant.vtu",
    min_facet_angle=25.0,
    max_radius_surface_delaunay_ball=0.15,
    max_facet_distance=0.008,
    max_circumradius_edge_ratio=3.0,
    verbose=False,
)
Meshes from INR voxel files
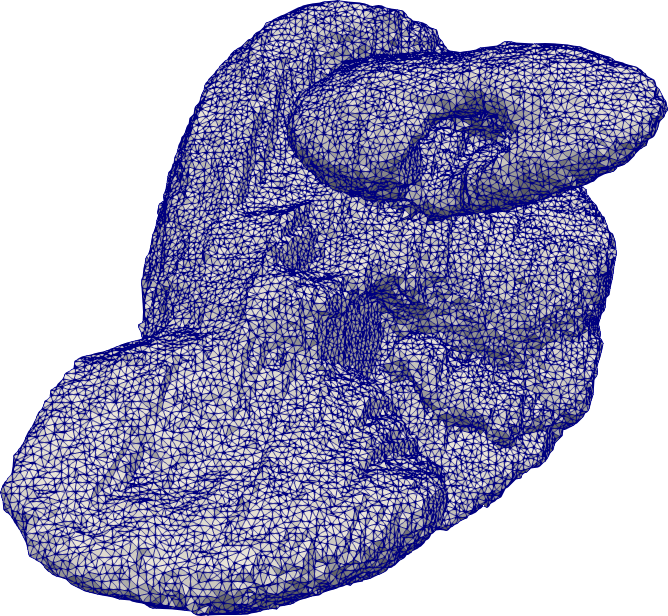
It is also possible to generate meshes from INR voxel files, e.g.,
here either on
the command line
pygalmesh from-inr skull_2.9.inr out.vtu --cell-size 5.0 --odt
(see pygalmesh from-inr -h for all options) or from Python
import pygalmesh

mesh = pygalmesh.generate_from_inr(
    "skull_2.9.inr",
    max_cell_circumradius=5.0,
    verbose=False,
)
Meshes from numpy arrays representing 3D images
pygalmesh can help generating unstructed meshes from 3D numpy int arrays specifying the
subdomains. Subdomains with key 0 are not meshed.
import pygalmesh
import numpy as np

x_ = np.linspace(-1.0, 1.0, 50)
y_ = np.linspace(-1.0, 1.0, 50)
z_ = np.linspace(-1.0, 1.0, 50)
x, y, z = np.meshgrid(x_, y_, z_)

vol = np.empty((50, 50, 50), dtype=np.uint8)
idx = x**2 + y**2 + z**2 < 0.5**2
vol[idx] = 1
vol[~idx] = 0

voxel_size = (0.1, 0.1, 0.1)

mesh = pygalmesh.generate_from_array(
    vol, voxel_size, max_facet_distance=0.2, max_cell_circumradius=0.1
)
mesh.write("ball.vtk")
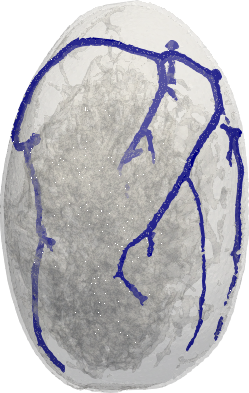
The code below creates a mesh from the 3D breast phantom from Lou et
al
available
here.
The phantom comprises four tissue types (background, fat, fibrograndular, skin, vascular
tissues). The generated mesh conforms to tissues interfaces.
import pygalmesh
import meshio

with open("MergedPhantom.DAT", "rb") as fid:
    vol = np.fromfile(fid, dtype=np.uint8)

vol = vol.reshape((722, 411, 284))
voxel_size = (0.2, 0.2, 0.2)

mesh = pygalmesh.generate_from_array(
    vol, voxel_size, max_facet_distance=0.2, max_cell_circumradius=1.0
)
mesh.write("breast.vtk")
In addition, we can specify different mesh sizes for each tissue type. The code below
sets the mesh size to 1 mm for the skin tissue (label 4), 0.5 mm for the vascular
tissue (label 5), and 2 mm for all other tissues (default).
mesh = pygalmesh.generate_from_array(
    vol,
    voxel_size,
    max_facet_distance=0.2,
    max_cell_circumradius={"default": 2.0, 4: 1.0, 5: 0.5},
)
mesh.write("breast_adapted.vtk")
Surface remeshing
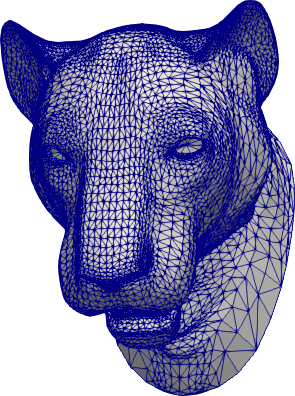
pygalmesh can help remeshing an existing surface mesh, e.g.,
lion-head.off. On
the command line, use
pygalmesh remesh-surface lion-head.off out.vtu -e 0.025 -a 25 -s 0.1 -d 0.001
(see pygalmesh remesh-surface -h for all options) or from Python
import pygalmesh

mesh = pygalmesh.remesh_surface(
    "lion-head.off",
    max_edge_size_at_feature_edges=0.025,
    min_facet_angle=25,
    max_radius_surface_delaunay_ball=0.1,
    max_facet_distance=0.001,
    verbose=False,
)
Installation
For installation, pygalmesh needs CGAL and
Eigen installed on your
system. They are typically available on your Linux distribution, e.g., on
Ubuntu
sudo apt install libcgal-dev libeigen3-dev
On MacOS with homebrew,
brew install cgal eigen
After that, pygalmesh can be installed from the Python Package
Index, so with
pip install -U pygalmesh
you can install/upgrade.
Troubleshooting
If pygalmesh fails to build due to fatal error: 'Eigen/Dense' file not found
you will need to create a symbolic link for Eigen to be detected, e.g.
cd /usr/local/include
sudo ln -sf eigen3/Eigen Eigen
It’s possible that eigen3 could be in /usr/include instead of
/usr/local/install.
Manual installation
For manual installation (if you’re a developer or just really keen on getting
the bleeding edge version of pygalmesh), there are two possibilities:
- Get the sources, type
python3 setup.py install. This does the trick
most the time.
- As a fallback, there’s a CMake-based installation. Simply go
cmake /path/to/sources/ and make.
Testing
To run the pygalmesh unit tests, check out this repository and type
pytest
Background
CGAL offers two different approaches for mesh generation:
- Meshes defined implicitly by level sets of functions.
- Meshes defined by a set of bounding planes.
pygalmesh provides a front-end to the first approach, which has the following advantages
and disadvantages:
- All boundary points are guaranteed to be in the level set within any specified
residual. This results in smooth curved surfaces.
- Sharp intersections of subdomains (e.g., in unions or differences of sets) need to be
specified manually (via feature edges, see below), which can be tedious.
On the other hand, the bounding-plane approach (realized by
mshr), has the following properties:
- Smooth, curved domains are approximated by a set of bounding planes, resulting in more
of less visible edges.
- Intersections of domains can be computed automatically, so domain unions etc. have
sharp edges where they belong.
See here for other
mesh generation tools.
License
This software is available under the GPLv3
license as well as a commercial
license. If you’d like to use this software commercially, please contact the
author.



评论