ACF Composer


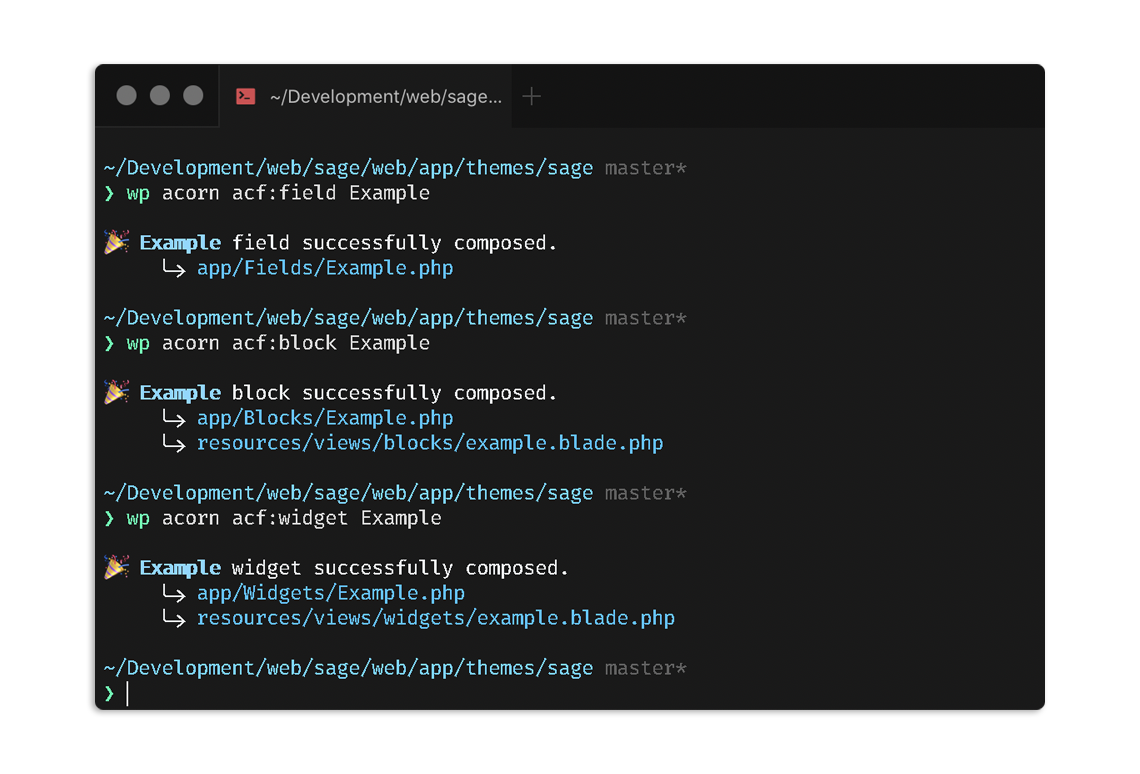
ACF Composer is the ultimate tool for creating fields, blocks, widgets, and option pages using ACF Builder alongside Sage 10 and 11.
Features
- 🔧 Encourages clean structuring for creating fields with Sage and ACF.
- 🚀 Instantly generate working fields, blocks, widgets, partials, and option pages using CLI. Batteries included.
- 🖼️ Fully rendered blocks and widgets using Blade with a native Sage feel for passing view data.
- ⚡ Seamlessly cache blocks to
block.json and field groups to a manifest.
- 📦 Automatically hooks legacy widgets with
WP_Widget making them instantly ready to use.
- 🛠️ Automatically sets field location on blocks, widgets, and option pages.
- 🌐 Globally define default field type and field group settings. No more repeating
['ui' => 1] on every select field.
Requirements
Installation
Install via Composer:
$ composer require log1x/acf-composer
Usage
Getting Started
Start by publishing the config/acf.php configuration file using Acorn:
$ wp acorn vendor:publish --tag="acf-composer"
Generating a Field Group
To create your first field group, start by running the following generator command from your theme directory:
$ wp acorn acf:field ExampleField
This will create src/Fields/ExampleField.php which is where you will create and manage your first field group.
Taking a glance at the generated ExampleField.php stub, you will notice that it has a simple list configured.
<?php

namespace App\Fields;

use Log1x\AcfComposer\Builder;
use Log1x\AcfComposer\Field;

class ExampleField extends Field
{
    /**
     * The field group.
     *
     * @return array
     */
    public function fields()
    {
        $fields = Builder::make('example_field');

        $fields
            ->setLocation('post_type', '==', 'post');

        $fields
            ->addRepeater('items')
                ->addText('item')
            ->endRepeater();

        return $fields->build();
    }
}
Proceed by checking the Add Post for the field to ensure things are working as intended.
Field Builder Usage
To assist with development, ACF Composer comes with a usage command that will let you search for registered field types. This will provide basic information about the field type as well as a usage example containing all possible options.
$ wp acorn acf:usage
For additional usage, you may consult the ACF Builder Cheatsheet.
Generating a Field Partial
A field partial consists of a field group that can be re-used and/or added to existing field groups.
To start, let’s generate a partial called ListItems that we can use in the Example field we generated above.
$ wp acorn acf:partial ListItems
<?php

namespace App\Fields\Partials;

use Log1x\AcfComposer\Builder;
use Log1x\AcfComposer\Partial;

class ListItems extends Partial
{
    /**
     * The partial field group.
     *
     * @return array
     */
    public function fields()
    {
        $fields = Builder::make('listItems');

        $fields
            ->addRepeater('items')
                ->addText('item')
            ->endRepeater();

        return $fields;
    }
}
Looking at ListItems.php, you will see out of the box it consists of an identical list repeater as seen in your generated field.
A key difference to note compared to an ordinary field is the omitting of ->build() instead returning the FieldsBuilder instance itself.
This can be utilized in our Example field by passing the ::class constant to ->addPartial():
<?php

namespace App\Fields;

use App\Fields\Partials\ListItems;
use Log1x\AcfComposer\Builder;
use Log1x\AcfComposer\Field;

class Example extends Field
{
    /**
     * The field group.
     *
     * @return array
     */
    public function fields()
    {
        $fields = Builder::make('example');

        $fields
            ->setLocation('post_type', '==', 'post');

        $fields
            ->addPartial(ListItems::class);

        return $fields->build();
    }
}
Generating a Block
Generating a block is generally the same as generating a field as seen above.
Start by creating the block field using Acorn:
$ wp acorn acf:block ExampleBlock
<?php

namespace App\Blocks;

use Log1x\AcfComposer\Block;
use Log1x\AcfComposer\Builder;

class ExampleBlock extends Block
{
    /**
     * The block name.
     *
     * @var string
     */
    public $name = 'Example Block';

    /**
     * The block description.
     *
     * @var string
     */
    public $description = 'Lorem ipsum...';

    /**
     * The block category.
     *
     * @var string
     */
    public $category = 'common';

    /**
     * The block icon.
     *
     * @var string|array
     */
    public $icon = 'star-half';

    /**
     * Data to be passed to the block before rendering.
     *
     * @return array
     */
    public function with()
    {
        return [
            'items' => $this->items(),
        ];
    }

    /**
     * The block field group.
     *
     * @return array
     */
    public function fields()
    {
        $fields = Builder::make('example_block');

        $fields
            ->addRepeater('items')
                ->addText('item')
            ->endRepeater();

        return $fields->build();
    }

    /**
     * Return the items field.
     *
     * @return array
     */
    public function items()
    {
        return get_field('items') ?: [];
    }
}
You may also pass --localize to the command above to generate a block stub with the name and description ready for translation.
$ wp acorn acf:block Example --localize
When running the block generator, one difference to a generic field is an accompanied View is generated in the resources/views/blocks directory.
@if ($items)
  <ul>
    @foreach ($items as $item)
      <li>{{ $item['item'] }}</li>
    @endforeach
  </ul>
@else
  <p>No items found!</p>
@endif

<div>
  <InnerBlocks />
</div>
Like the field generator, the example block contains a simple list repeater and is working out of the box.
Block Preview View
While $block->preview is an option for conditionally modifying your block when shown in the editor, you may also render your block using a seperate view.
Simply duplicate your existing view prefixing it with preview- (e.g. preview-example.blade.php).
With WordPress 5.8, Blocks can now be used as widgets making this feature somewhat deprecated as you would just make a block instead.
If you are on the latest WordPress and would like to use the classic widget functionality from ACF Composer, you will need to opt-out of the widget block editor.
Creating a sidebar widget using ACF Composer is extremely easy. Widgets are automatically loaded and rendered with Blade, as well as registered with WP_Widget which is usually rather annoying.
Start by creating a widget using Acorn:
$ wp acorn acf:widget ExampleWidget
<?php

namespace App\Widgets;

use Log1x\AcfComposer\Builder;
use Log1x\AcfComposer\Widget;

class ExampleWidget extends Widget
{
    /**
     * The widget name.
     *
     * @var string
     */
    public $name = 'Example Widget';

    /**
     * The widget description.
     *
     * @var string
     */
    public $description = 'Lorem ipsum...';

    /**
     * Data to be passed to the widget before rendering.
     *
     * @return array
     */
    public function with()
    {
        return [
            'items' => $this->items(),
        ];
    }

    /**
     * The widget title.
     *
     * @return string
     */
    public function title() {
        return get_field('title', $this->widget->id);
    }

    /**
     * The widget field group.
     *
     * @return array
     */
    public function fields()
    {
        $fields = Builder::make('example_widget');

        $fields
            ->addText('title');

        $fields
            ->addRepeater('items')
                ->addText('item')
            ->endRepeater();

        return $fields->build();
    }

    /**
     * Return the items field.
     *
     * @return array
     */
    public function items()
    {
        return get_field('items', $this->widget->id) ?: [];
    }
}
Similar to blocks, widgets are also accompanied by a view generated in resources/views/widgets.
@if ($items)
  <ul>
    @foreach ($items as $item)
      <li>{{ $item['item'] }}</li>
    @endforeach
  </ul>
@else
  <p>No items found!</p>
@endif
Out of the box, the Example widget is ready to go and should appear in the backend.
Generating an Options Page
Creating an options page is similar to creating a regular field group in additional to a few configuration options available to customize the page (most of which, are optional.)
Start by creating an option page using Acorn:
$ wp acorn acf:options ExampleOptions
<?php

namespace App\Options;

use Log1x\AcfComposer\Builder;
use Log1x\AcfComposer\Options as Field;

class ExampleOptions extends Field
{
    /**
     * The option page menu name.
     *
     * @var string
     */
    public $name = 'Example Options';

    /**
     * The option page document title.
     *
     * @var string
     */
    public $title = 'Example Options | Options';

    /**
     * The option page field group.
     *
     * @return array
     */
    public function fields()
    {
        $fields = Builder::make('example_options');

        $fields
            ->addRepeater('items')
                ->addText('item')
            ->endRepeater();

        return $fields->build();
    }
}
Optionally, you may pass --full to the command above to generate a stub that contains additional configuration examples.
$ wp acorn acf:options Options --full
Once finished, you should see an Options page appear in the backend.
All fields registered will have their location automatically set to this page.
Caching Blocks & Fields
As of v3, ACF Composer now has the ability to cache registered blocks to native block.json files and field groups to a flat file JSON manifest automatically using CLI.
This can lead to a dramatic increase in performance in projects both small and large, especially when loading a post in the editor containing multiple custom blocks.
Making changes to blocks or fields once cached will not take effect until cleared or re-cached.
The best time to do this is during deployment and can be done using the acf:cache command:
$ wp acorn acf:cache [--status]
Cache can then be cleared using the acf:clear command:
$ wp acorn acf:clear
The ACF Composer cache status can be found using --status on acf:cache as seen above or by running wp acorn about.
Custom Stub Generation
To customize the stubs generated by ACF Composer, you can easily publish the stubs directory using Acorn:
$ wp acorn acf:stubs
The publish command generates all available stubs by default. However, each stub file is optional. When a stub file doesn’t exist in the stubs/acf-composer directory, the default stub provided by the package will be used.
Default Field Settings
A useful feature unique to ACF Composer is the ability to set field type as well as field group defaults. Any globally set default can of course be over-ridden by simply setting it on the individual field.
Global
Taking a look at config/acf.php, you will see a few pre-configured defaults:
'defaults' => [
    'trueFalse' => ['ui' => 1],
    'select' => ['ui' => 1],
],
When setting trueFalse and select to have their ui set to 1 by default, it is no longer necessary to repeatedly set 'ui' => 1 on your fields. This takes effect globally and can be overridden by simply setting a different value on a field.
Field Group
It is also possible to define defaults on individual field groups. This is done by simply defining $defaults in your field class.
/**
 * Default field type settings.
 *
 * @return array
 */
protected $defaults = ['ui' => 0];
My Defaults
Here are a couple defaults I personally use. Any prefixed with acfe_ are related to ACF Extended.
'defaults' => [
    'fieldGroup' => ['instruction_placement' => 'acfe_instructions_tooltip'],
    'repeater' => ['layout' => 'block', 'acfe_repeater_stylised_button' => 1],
    'trueFalse' => ['ui' => 1],
    'select' => ['ui' => 1],
    'postObject' => ['ui' => 1, 'return_format' => 'object'],
    'accordion' => ['multi_expand' => 1],
    'group' => ['layout' => 'table', 'acfe_group_modal' => 1],
    'tab' => ['placement' => 'left'],
    'sidebar_selector' => ['default_value' => 'sidebar-primary', 'allow_null' => 1]
],
Bug Reports
If you discover a bug in ACF Composer, please open an issue.
Contributing
Contributing whether it be through PRs, reporting an issue, or suggesting an idea is encouraged and appreciated.
License
ACF Composer is provided under the MIT License.


评论